
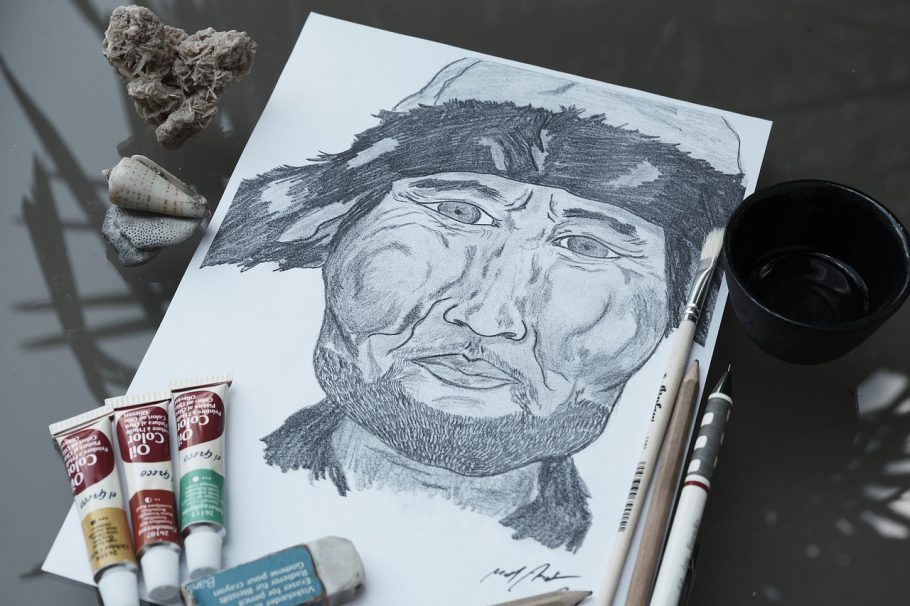
Are you interested in creating lifelike portraits using pencils? In this article, we will guide you through the step-by-step process of drawing a realistic portrait. You will learn how to capture accurate proportions, add shading and details, and bring your artwork to life.
Creating a realistic portrait requires attention to detail and a good understanding of facial proportions. We will start by discussing the essential tools and materials needed for this art form. Different types of pencils, erasers, and paper will be introduced to help you achieve the desired effect. Once you have gathered the right materials, we will dive into the fascinating world of facial proportions.
Understanding facial proportions is crucial for creating a lifelike portrait. We will explore the key principles of facial anatomy and teach you how to accurately map out the features of a face. You will learn techniques for measuring and using grid techniques to ensure precise placement and proportions of facial features. These techniques will greatly enhance the realism of your portrait.
Gathering the Right Materials
Gathering the right materials is the first step in creating a realistic portrait with pencils. To bring your artwork to life, you’ll need a few essential tools and materials. Let’s explore what you’ll need:
- Pencils: Different types of pencils will be necessary to achieve various shades and textures in your portrait. You’ll want to have a range of graphite pencils, from hard (H) to soft (B), to create light and dark areas.
- Erasers: Erasers are essential for correcting mistakes and adding highlights to your portrait. Consider having a kneaded eraser for lifting graphite and a white vinyl eraser for more precise erasing.
- Paper: Choosing the right paper is crucial for achieving realistic results. Look for a heavyweight paper with a smooth surface, such as Bristol board or drawing paper, that can handle multiple layers of graphite without smudging.
By gathering these essential tools and materials, you’ll be well-equipped to embark on your journey of creating a lifelike portrait with pencils. Now that you have everything you need, let’s move on to the next step: understanding facial proportions.
Understanding Facial Proportions
When it comes to drawing a realistic portrait, understanding facial proportions is crucial. By mastering the key principles of facial proportions, you can accurately map out the features of a face, including the eyes, nose, mouth, and ears.
One of the first steps in understanding facial proportions is to recognize that the face can be divided into equal thirds. The top third includes the forehead and hairline, the middle third includes the eyes, nose, and mouth, and the bottom third includes the chin. By dividing the face in this way, you can ensure that the features are placed correctly and maintain a sense of balance.
Next, it’s important to pay attention to the size and placement of the features. For example, the eyes are typically located halfway between the top of the head and the chin, and they are usually spaced one eye-width apart. The nose is often centered between the eyes and extends down to about the same length as an eye. The mouth is typically located halfway between the bottom of the nose and the chin.
Additionally, understanding the basic shapes of the features can help in accurately drawing them. For instance, the eyes are often almond-shaped, the nose can be simplified into triangles and rectangles, and the mouth can be represented by a curved line with a slight dip in the middle.
By mastering the principles of facial proportions, you can create more lifelike and realistic portraits. Practice observing and measuring the features of faces, and soon you’ll be able to accurately map them out in your own drawings.
Measuring and Grid Techniques
When it comes to creating a realistic portrait, accurate placement and proportions of facial features are crucial. That’s where measuring and grid techniques come into play. By using these techniques, you can ensure that your portrait captures the true essence of the subject.
Measuring involves using your pencil or a ruler to determine the relative size and placement of different features on the face. By comparing the proportions of one feature to another, you can accurately depict the unique characteristics of your subject.
Grid techniques, on the other hand, involve dividing your reference image and drawing surface into a grid. This grid allows you to break down the complex features of the face into smaller, more manageable sections. By focusing on one grid square at a time, you can ensure that each part of the portrait is accurately represented.
By combining measuring and grid techniques, you can achieve a more realistic portrait with precise placement and proportions. These techniques provide a solid foundation for capturing the true likeness of your subject and bringing your artwork to life.
Creating Depth and Shading
Creating depth and shading is a crucial step in bringing your portrait to life. It adds dimension and realism to your artwork, making it visually captivating. To master this art, you will need to familiarize yourself with various pencil techniques such as hatching, cross-hatching, and blending.
Hatching involves drawing parallel lines in one direction to create shading. By varying the spacing and thickness of the lines, you can achieve different levels of darkness and texture. Cross-hatching, on the other hand, involves layering intersecting lines to create more depth and complexity.
Blending is another important technique that helps smooth out harsh lines and transitions. You can use your finger, a blending stump, or a tissue to gently blend the pencil strokes together, creating a seamless and realistic effect.
Experiment with different pencil pressures and strokes to achieve the desired shading effect. Light pressure will create lighter shades, while heavy pressure will result in darker tones. Remember to consider the direction of light source in your portrait, as it will affect the placement and intensity of shadows.
By practicing and refining these techniques, you will be able to add depth and dimension to your portrait, making it appear three-dimensional and lifelike.
Adding Details and Textures
Adding details and textures is a crucial step in creating a realistic and lifelike portrait. It is these intricate elements that bring your artwork to life and make it truly stand out. Let’s explore some techniques and tips for adding these details.
When it comes to drawing hair, it’s important to pay attention to the direction and flow of the strands. Start by lightly sketching the overall shape of the hair, then gradually add individual strands using short, feathery strokes. Vary the thickness and darkness of the strokes to create depth and volume. Remember to observe the texture and movement of the hair, whether it’s straight, curly, or wavy.
Next, let’s talk about skin texture. To depict realistic skin, it’s essential to understand the different tones and textures present. Start by lightly shading the overall area, then gradually build up layers of shading to create depth and dimension. Pay attention to areas of highlights and shadows, as well as any imperfections or blemishes that add character to the face. Use a blending tool or your fingers to smooth out any harsh lines and create a seamless transition between tones.
When it comes to clothing, consider the fabric and its texture. Is it smooth and sleek, or rough and textured? Use different pencil techniques, such as cross-hatching or stippling, to create the desired effect. Pay attention to folds, wrinkles, and creases in the fabric, as they add realism and movement to your artwork.
Remember, adding details and textures requires patience and attention to detail. Take your time and observe the subject closely. By incorporating these techniques, you can bring your portrait to life and create a truly realistic and lifelike artwork.
Capturing Expressions and Emotions
When it comes to drawing a realistic portrait, capturing the expressions and emotions of your subject is crucial. It is what brings your artwork to life and makes it truly unique. But how can you achieve this level of realism?
One technique that can help you capture expressions and emotions is the use of light and shadow. By understanding how light falls on the face and creates different tones and shadows, you can convey a variety of moods and personalities in your portrait.
For example, by emphasizing the shadows under the eyes, you can create a sense of mystery or sadness. On the other hand, highlighting the cheekbones and forehead can give your subject a more confident and radiant look. Experimenting with different lighting angles and intensities can help you achieve the desired effect.
Another important aspect of capturing expressions and emotions is paying attention to the small details. The subtle movements of the eyebrows, the curve of the lips, and the wrinkles around the eyes can all contribute to the overall expression of the face. Take your time to observe these details and incorporate them into your drawing.
Additionally, studying facial anatomy and understanding how different facial muscles work can also help you accurately depict expressions. For example, when a person smiles, the muscles around the mouth and eyes contract, creating specific lines and shapes on the face. By studying and practicing these muscle movements, you can enhance the realism of your portrait.
Remember, capturing expressions and emotions requires practice and observation. Take the time to study different facial expressions and experiment with different techniques to convey the desired mood and personality in your portrait. With dedication and patience, you can create lifelike and emotionally impactful portraits.
Refining and Finishing Touches
Refining and finishing touches are the crucial steps that take your portrait from good to exceptional. In this stage, you will focus on perfecting the details and adding depth to your artwork.
One of the first tasks is adjusting the values in your portrait. This means fine-tuning the light and dark areas to create a more realistic and three-dimensional effect. You can achieve this by using a range of pencil tones and carefully blending them to create smooth transitions between shadows and highlights.
Enhancing highlights and shadows is another important aspect of refining your portrait. By adding subtle highlights to areas that catch the light and deepening the shadows, you can create a greater sense of depth and dimension. This technique helps to bring your subject to life and adds a sense of realism to the artwork.
Lastly, creating a polished finish is essential to make your portrait truly stand out. Take the time to carefully review your artwork and make any necessary adjustments. Pay attention to small details, such as stray lines or smudges, and erase or blend them accordingly. This final step ensures that your portrait is clean, professional-looking, and ready to be admired.
Frequently Asked Questions
- Q: What materials do I need to draw a realistic portrait with pencils?
A: To create a lifelike portrait, you will need a set of high-quality pencils ranging from 2H to 6B, a good eraser, and smooth drawing paper. It’s also helpful to have a blending stump or cotton swabs for shading and blending.
- Q: How important is understanding facial proportions in portrait drawing?
A: Understanding facial proportions is crucial for creating a realistic portrait. It helps you accurately map out the features of a face and ensure proper placement. By mastering facial proportions, you can capture the likeness and character of your subject more effectively.
- Q: What techniques can I use to add depth and shading to my portrait?
A: There are several techniques you can use, such as hatching, cross-hatching, and blending. Hatching involves creating parallel lines to indicate shading, while cross-hatching involves intersecting lines. Blending helps to smooth out transitions and create a more realistic look.
- Q: How can I capture expressions and emotions in my portrait?
A: To capture expressions and emotions, pay attention to the play of light and shadow on the face. Use shading techniques to create depth and emphasize certain features. Additionally, focus on the eyes and mouth, as they often convey the most emotion in a portrait.
- Q: What are some tips for adding details and textures to my portrait?
A: When adding details and textures, observe the subject closely. Study the unique characteristics of their hair, skin texture, and clothing. Use different pencil strokes and values to recreate these details, paying attention to highlights and shadows to add dimension.
- Q: How can I refine and add finishing touches to my portrait?
A: Once you have the basic structure and details in place, take time to refine your portrait. Adjust values to create a range of light and dark tones. Enhance highlights and shadows to add depth and realism. Finally, carefully review your work and make any necessary adjustments for a polished finish.


